How to make a layered Christmas gift tag
- Read time: 3 minutes
- Written by: Crafter's Companion
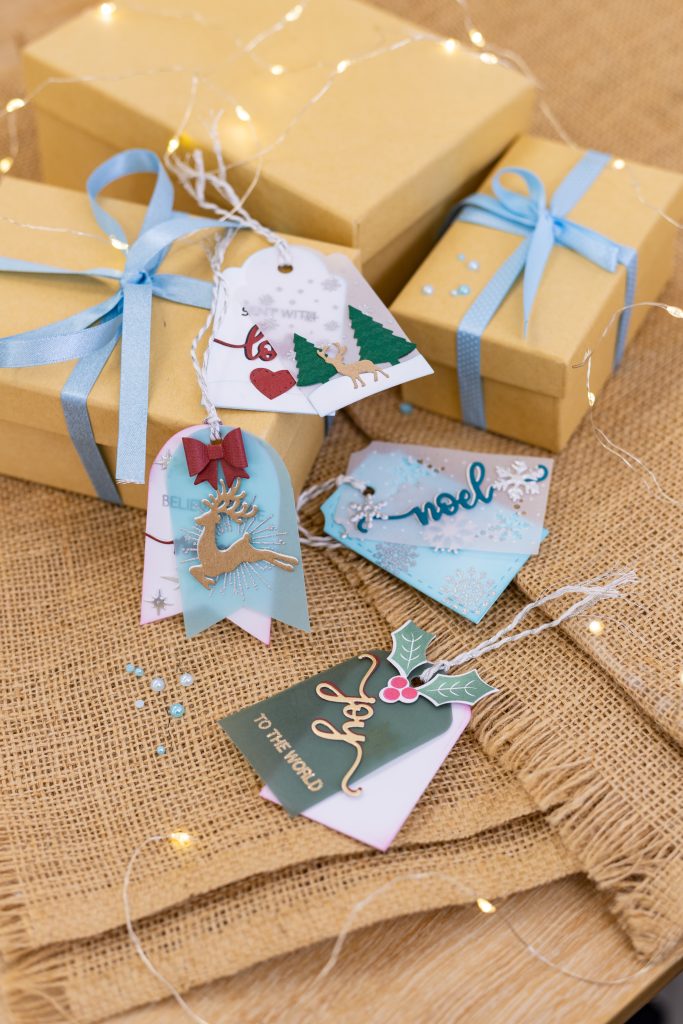
Christmas will be here before you know it and preparation is key! Homemade gifts and wrapping always go down a treat as it adds a personal touch to anything you give to your loved ones. Why not create a layered gift tag to add to your gift wrap?
Follow our guide below to create your own.
You will need:
- Gemini Stamp and Die Kit (We’d recommend the Sending Christmas Cheer kit, but you can use any tag-based kit!)
- 1 sheet of vellum measuring 3.5 x 2.5”
- 2pc White multipurpose card measuring 3.5 x 2.5”
- Craft tape
- 3 small pieces of metallic multipurpose card in your preferred colours (we’ve used blue, green and gold)
- Gemini Die Cutting and Embossing Machine
- Crafter’s Companion Pokey Tool
- Crafter’s Companion Stamping Platform
- Ink pad – We’ve used a Spectrum Noir Waterproof Inkpad in the shade ‘Noir Black’
- Crafter’s Companion Tape Pen
- Spectrum Noir Watermark – Translucent Clear
- Silver Embossing Powder
- Crafter’s Companion Heat Tool
- Hot glue gun
- Foam sticky pads
- 1pc string
Creating your tag
- Take a piece of white multipurpose card measuring 3.5 x 2.5”, and a piece of vellum measuring the same, placing the vellum on top of your white card.
- Open your Stamp & Die Kit and lay out all of your metal dies. Take the largest and main tag-shaped die, and place this over the top of your vellum and card. Secure this in place with craft tape.
- Take your second piece of white card, your metallic pieces and the rest of the smaller dies over these and secure them in place with your tape. It’s entirely your choice when it comes to colours as it can depend on the set that you’re using, but we’ve used a metallic green for the trees, blue for the sentiment and heart, gold for the deer and used white card for the snow.
- Once these are all in place and secure, put together your preferred plate combination and pass them through your Gemini Die Cutting Machine. You can do these all together, or in stages if using a smaller machine like the Gemini Mini. Now you have all your die-cut designs, lay these out flat and to one side.
- Now it’s stamping time! Take your stamping platform and stick the sentiment stamps to it. With your ink pad, dab over generously until your stamps are fully covered. Stamp these onto your tag-shaped white card using your stamping platform as a guide. You can also use the Crafter’s Companion Rock-a-Blocks for a more accurate press.
- As our sentiment says ‘sent with’, we’ve then taken the die-cut metallic ‘love’ piece and stuck this underneath using the Crafter’s Companion Tape Pen.
- Now take your die-cut vellum piece. Using the snowflake stamp and your Spectrum Noir Translucent Clear Inkpad, stamp this onto your vellum piece so you have a clear stamped design.
- Sprinkle silver embossing powder over the stamped image until it fully covers it, tapping any excess off when you’re satisfied with the coverage. Using your heating tool under the vellum, set the powder in place.
- Decorate the rest of your vellum with your remaining die-cut pieces, sticking them in place with a hot glue gun. To make any of the pieces stand out, simply stick them down with foam pads, adding dimension to each bit.
- Now that your tags are fully decorated, place the vellum over the white tag and tie together with a piece of string. Your layered tag is now complete!

Share your creations with us on Social Media! Post and use the hashtag #crafterscompanion, or tag us on Facebook, Instagram, LinkedIn, or TikTok.
